The Casual Bucket - finish with overlapping edges
For our popular Bucket Bag there is now an alternative processing variant of the bag body!
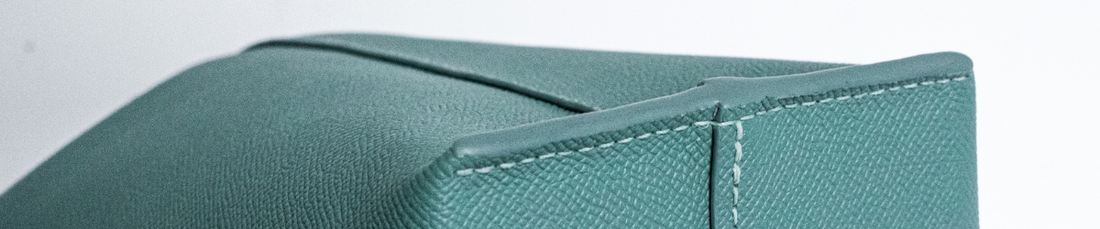
Here, the side and bottom seams are shortened and finished so that they are visible on the outside - i.e. not turned inside out and sewn down as in the original instructions. This can be advantageous for various reasons and gives your bucket bag a completely new look with the focus on the edge finishing.
Before we start with the detailed instructions and the adjustments to the DIY box, here are the advantages of this processing method and a few tips on what you should consider before making your decision.
When is this processing method particularly useful?
- ... if you have a particularly rigid leather where folding over and sewing down the seam allowances and especially turning the bag is somewhat more difficult. Leathers where this may apply are, for example, rigid leathers in the Caviar and Epi textures or the smooth leather from the standard collection.
- ... if you prefer edge finishing to sewing. The sewing time is reduced by approx. 3-4 hours with this processing variant, as both the bottom seam and the side seams are only sewn in one row instead of three rows. The seam for the pocket depth is also sewn more quickly. You will probably invest about half of the "time saved" in the additional edge finishing that is necessary for this processing.
- ... if you want a slightly smaller bucket bag. By shortening the seam allowances and moving the seam to close the sides and base, the bag is approx. 5 cm smaller in width. The base of the bottom of this bag measures approximately 21 cm wide and 11 cm deep on the inside.
- ... if you want to use a loose lining bag, as we did in our blog article "The Casual Bucket - using a loose lining", you can sew the lining bag into the bottom seams. This will keep it in place, prevent it from warping so easily and make it look nicer in your bucket bag.

What should you bear in mind with this processing option?
- The bag is slightly smaller. A 12-inch iPad Pro fits into this version of the bucket bag, but it protrudes 1 cm from the bag.
- The "Inside my Bag" bag organizer from Cherry Picking Studio just fits into the bag in this version and should not be made from bulky fabric.
- You will have to make alterations to the leather parts yourself by cutting off the seam allowance and re-stitching some holes, although only straight cuts are necessary, but you will still need either particularly good leather scissors, a cutter knife or a rotary cutter and a ruler. You can pierce the holes with an awl.
- As the edges that close the bottom depth point slightly more downwards downwards, this bag is a little more vulnerable if you often place it on rough or dirty floors. You can remedy this by hanging the bag or using bag feet and also bending the finished edges upwards.

Processing bucket bags with visible edges - here's how!
Note: These instructions only explain the changes you need to make to produce this alternative version. It supplements the existing instructions that you received as a download after ordering. Steps such as making the inside pocket, attaching pocket feet etc. are not covered.
Additional step: Cut parts to size
Before you finish the bucket according to the original instructions, you have to cut some parts. If you have never cut leather before, take a look at our free video tutorial. As these are only straight cuts, which are then finished with edge color, this step is easy to do. If necessary, test the cutting of the long straight lines beforehand by making a cut a little further out on the side edges. If you still want to use two remnants of the side and one bottom section, keep these for a while.
Then cut the following parts as shown in the drawings:

Shorten 2x bottom parts from reinforcement above the row of seams by a total of 12 mm

2x leather bag bodies: first shorten the sides and the bottom by 9mm and then by a further 15mm. Save the cut strips (9mm) for further processing.
Alternatively, you can also cut 24mm off each edge, but you should be aware that you will then have open lining edges inside your bag, which can fray over time. If you are using an additional loose lining bag, you can use the lining with open edges without hesitation.

Then complete the holes in the four side seams using your awl (marked in orange here). You can use one of the cut strips as a template.
Incidentally, these seam holes do not have to be 100% perfect, as they will later be covered by the D-ring edging.
Then take a D-ring edging piece and place it in the center as shown in the drawing. centered on the side seam of the outside of the leather as shown in the drawing. If necessary, you can fix it to the leather with a strip of Stylefix or similar to prevent it from slipping. Use your awl to pierce the holes (marked in pink here).
Note: Piercing the holes is more difficult with rigid leather than with soft leather. If your awl is no longer sharp enough, you can sharpen it a little with your sanding sponge.
Also make sure you choose a firm surface (e.g. an old cutting mat or a thin cork block) so that it is easier to cut the holes and the hole is not too large.
Now carry out steps 1 - 8 as described in the original instructions and cut off the excess lining flush along the edges of the leather.
If you process the lining with open edges, we recommend that you also glue it outside the holes to make the edges more durable.
Additional step: Processing the edges
The bag body is sewn overlapping at the bottom and sides so that the seams of the front part overlap those of the back part. This means that the lining of the side and bottom edges of the back section are exposed inside the bag.
To protect these, you can use one of the cut-off strips (9 mm) from the bottom edge and 2 strips from the side edge as a facing. Glue the strips flush to the lining of the back piece from the inside. Make sure that the seam holes match and that no glue gets on the seam holes to make sewing easier.
Then finish the edges of the side panels and the base. The edge of the base depth does not need to be processed in this step.
Tip: If you take care when finishing the edges of the front part of the pocket body, the lining slightly with base coat and edge color as wellyou can protect the lining from fraying.

Now sew the body of the bag.
Replacement for steps 9 - 12 of the original instructions: Sewing the bag body
Note: Optionally, you can also sew on the inner strip of the top edge first if you find this easier and are not using loose lining (last section in this article - note on step 13). At this stage, you could still clamp the pieces in a sewing clamp if necessary.
First you sew the bottom edges overlapping so that one edge is on the outside and one edge is on the inside. If you covered one edge with a leather strip from the inside in the previous step, make sure that the pieces overlap so that this side is on the inside. The raw-edged edge of the pocket body front piece with lining is on the outside. Sew the edge with the saddle stitch and finish the stitch as usual.
The two side seams are then side seams are also sewn overlapping. Again, make sure that the back of the pocket body is on the inside.
Start from the bottom and sew to the top edge of the bag. These seams can be a little awkward as you cannot see the seam holes inside the bag. We recommend that you pin the pieces together with basting pins or baste them together with five long stitches so that the pieces do not slip, sew the thread well at the end and secure the end of the thread again with a dot of glue.

Finally, the only thing missing is the seam of the pocket depth. Place the unsewn edges on top of each other so that the bottom and side seams meet. Secure everything with a few document clips or pins. Then sew the entire depth of the pocket. Make sure that you really start at the first stitch, even if it is a little tight here due to the corner of the pocket. If necessary, prick the holes briefly with an awl to make them easier to hit.
Additional step: Edge processing of the sides and pocket depth
Now comes the hard work. Let yourself be prepared for the the bottom edges as they will come into their own on the finished bag. If there is still some lining fabric sticking out at the edge, you can now carefully cut it away with scissors. Apply as many layers of base coat until you are satisfied with the plasticity of the edge. Then apply the edge color.
Tip: If you want to work on both edges at the same time, you can place the bag body upside down.

Now make the bucket as described in the original instructions from step 13 - 18 and follow the instructions below:
to step 13: The edging strips do not cover every hole in the top edge. One hole will remain uncovered on each side of the pocket. However, this 2-3 mm gap will not be noticeable later and can be easily concealed during the final edge processing.
to step 17: Sew the D-ring edgings from the outside so that the original holes for the edgings are covered. If you have difficulty getting through the leather with the pins, you can re-pierce the holes with your awl.
We recommend shaping the bottom depth again with your fingers. Then stuff your bag well (e.g. for 24 hours) to shape it. If you want to protect the edges of the bottom depth from wear and tear, we recommend shaping them upwards.
Then your new - slightly different - bucket bag is ready!
Congratulations!